Contemporary Side Table Routing Project
This delicate but highly functional side table comprises of four octagonal legs, four top cross rails and an intersecting cross brace near the bottom.

I have been taken to task recently by someone who complained that many of my projects involve using large amounts of expensive timber and therefore put them out of the reach of the home woodworker. Whilst I consider this criticism was perhaps a little unfair, it is true that I do always prefer working with hardwood and yes, by chance, several of the recent jobs have been on a larger scale.
However, not one to refuse a challenge, I decided to go down the budget route this month and see exactly what I could make without spending a fortune on materials. Purely by chance I had also been asked to make a small side table which was to be painted, so it seemed the ideal opportunity to kill two birds with one stone.
This very basic design is copied from a book, drawn to illustrate that simple projects can have a certain elegance of their own. It comprises of four octagonal legs, four top cross rails and an intersecting cross brace near the bottom. The delicate but highly functional result is definitely a case of less is more, something I need to bear in mind for future work!
Step 1 - Selecting and Preparing the Timber
The first job is to laminate up the thicker section legs and it is much easier to do this as one piece rather than doing each leg individually.
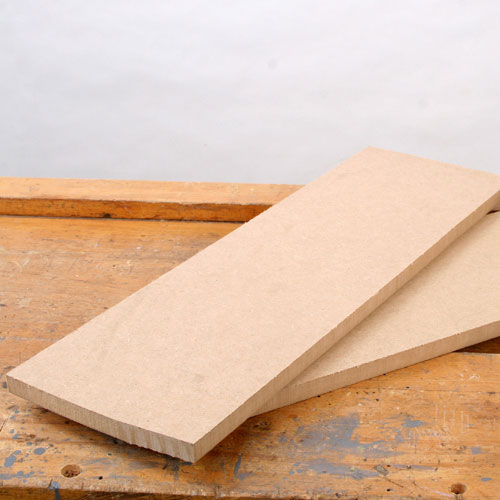
Cut two pieces of MDF slightly bigger in width than the combined width of the four legs, to allow some cleaning up room.
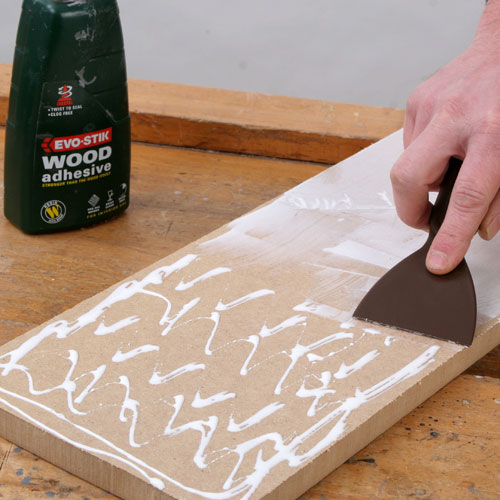
Cover the face of one piece with PVA glue, making sure it is spread evenly all over the surface to minimize the size of the glue line.
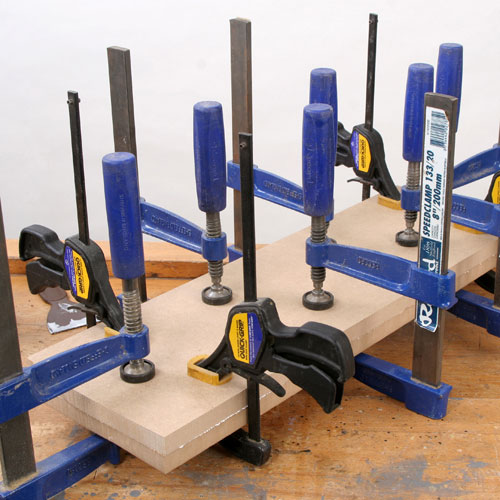
Apply plenty of a gentle clamping pressure to get the joint really tight, and leave it all to dry thoroughly for at least 12 hours.
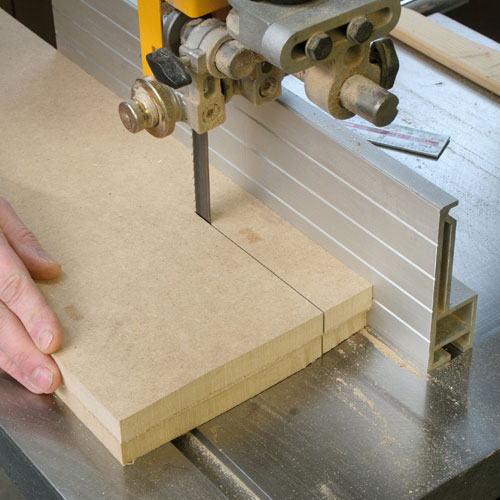
When you´re sure the glue is fully cured, plane one of the long edges dead true and then use this against the bandsaw fence to rip out the four legs, cutting them slightly over width, and re-planing the rough sawn edge on the remaining piece between each cut.

Now carefully thickness the leg blanks, so that the cut width exactly matches the thickness of the two glued up sections i.e. 36mm. When you´re using the planer and thicknesser with MDF, always machine narrow sections at one end of the blade to avoid damaging the rest of the cutting edges, as MDF is so abrasive.
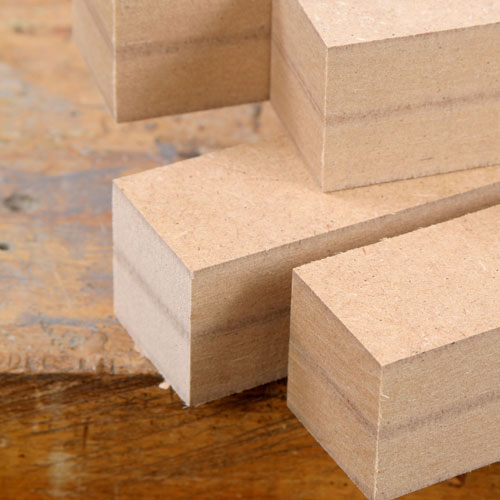
Provided you have spread the glue evenly and clamped thoroughly, the glue line should be minimal and although it is still clearly visible due to the colour change on the surface of each piece, the joint will in fact be invisible when it is painted later.
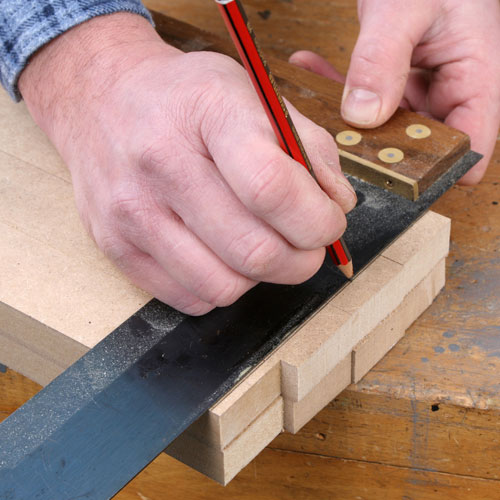
As with any piece of furniture making, it is vital that matching components are exactly the same length, probably more so on a table or chair, where any discrepancies will cause it to rock. So scribe a line across all four legs, and cut them accurately to length.
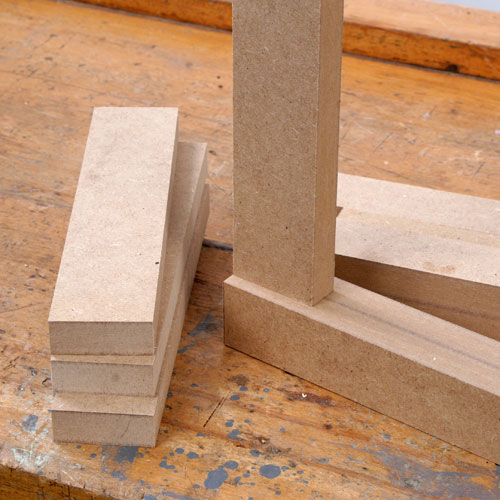
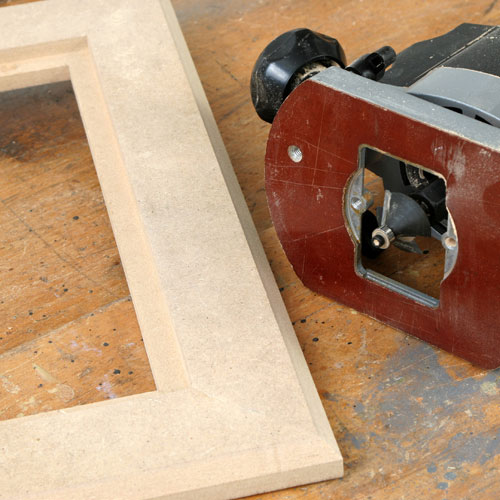
The problem now is how to join the cross rails into the legs, As the whole structure is to be painted the simplest option is to just screw through the leg in the end of the rail and fill the holes. However this is not a totally satisfactory solution, as I usually find that MDF has a nasty habit of de-laminating when you screw into the end of thin sections. A better answer is to use biscuits and glue for all of the joints.

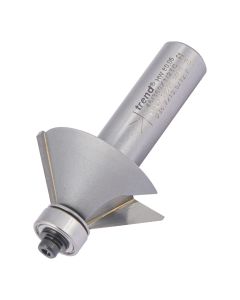
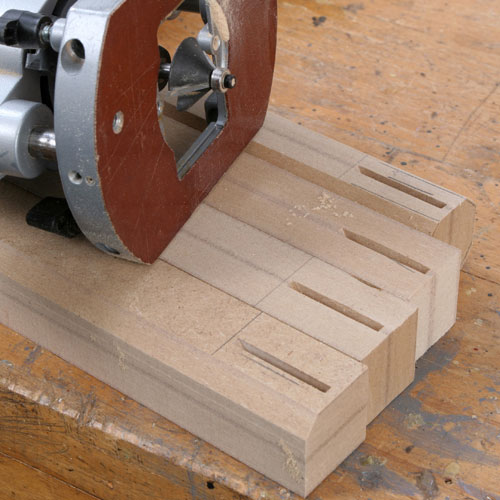
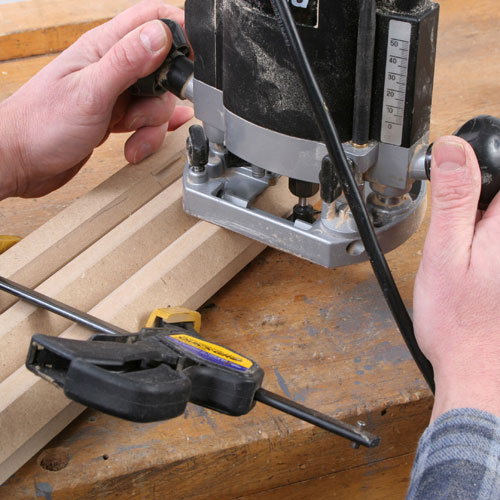
As the rail sections are relatively narrow, a standard biscuit jointer with its large diameter sawblade would only cut a very shallow slot, so instead, use a biscuit jointing cutter in the router as this has a much smaller diameter. It is bearing guided to control the depth of cut.
Step 2 - Routing Application
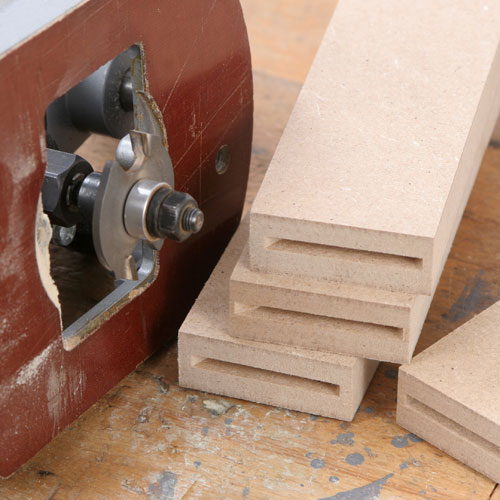
Use it carefully to cut the longest possible slot without breaking out into the edges of the rails.
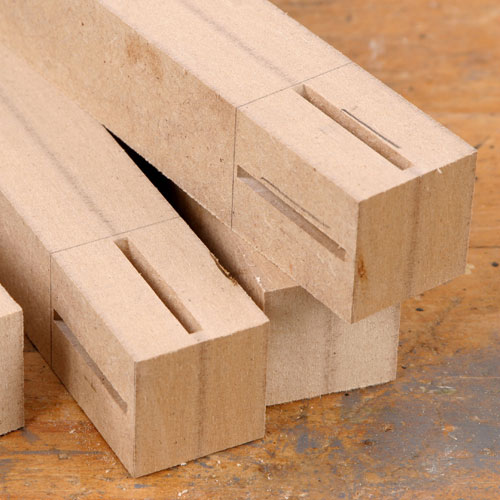
Repeat the procedure on the top of the legs, making sure the cutter is cantered precisely, or you will have trouble lining up the rails later when the legs are shaped.
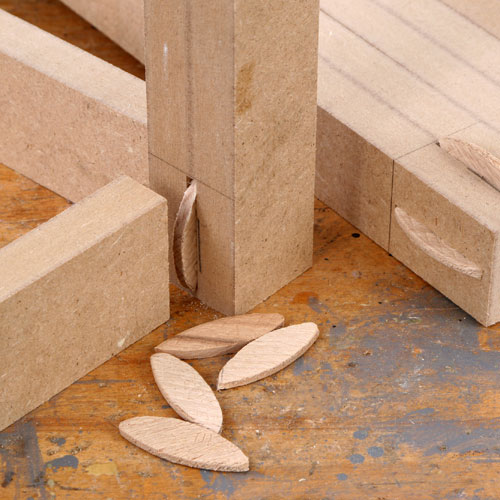
Because the slots are quite short you have to make your own suitably sized biscuits; I shaped them by reducing No. 0 biscuits on the disc sander, holding them with a pair of pliers for safety.
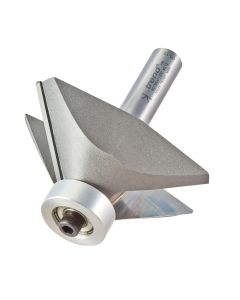
With the rail slots cut, you can now shape the legs and for this I used a 45 degree chamfer cutter in the router. However, this is removing a large amount of material and accordingly generates huge amount of dust, so take adequate precautions using a dust extractor and a suitable face mask. Lay all the legs out side-by-side on the bench to provide maximum support for the router base as you machine each edge in turn.
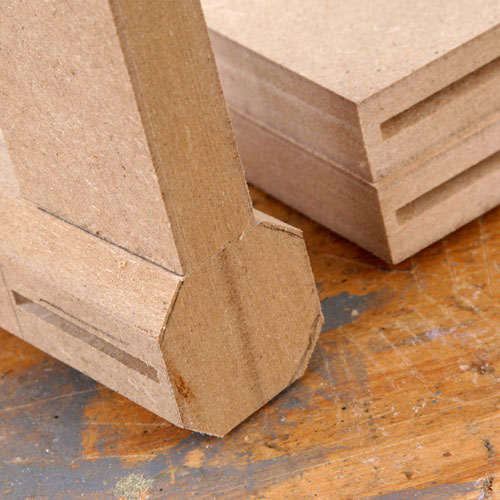
If you are using 18mm MDF, you cannot make the legs truly octagonal as the remaining face will be too narrow for the cross rails.
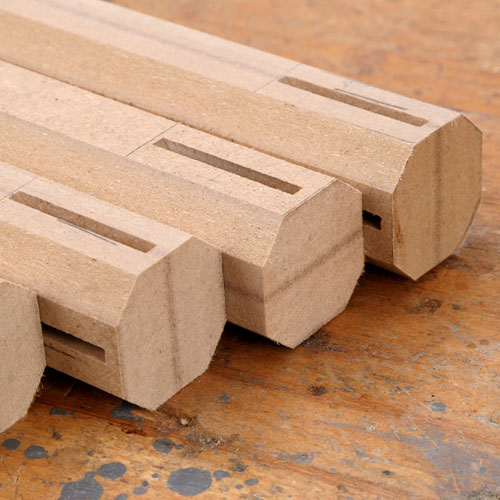
Take your time to adjust the router depth carefully, until the finished face is exactly the same thickness as the rail and then repeat the procedure along the full length on all the other legs.
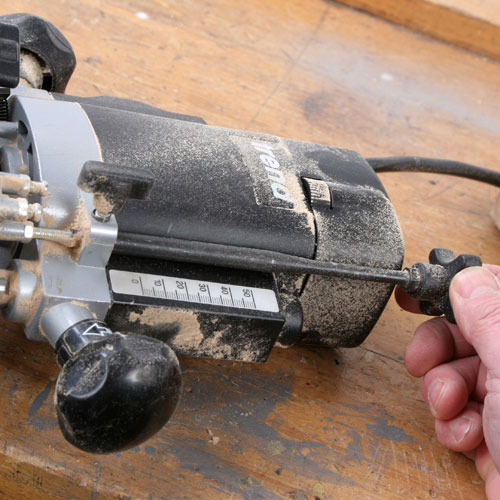
With any job like this, or for cutting the biscuit slots, where the depth of cut is critical, it is a great help to fit a fine height adjuster on the router, as it allows you to make minute adjustments that are virtually impossible using the standard plunge mechanism.
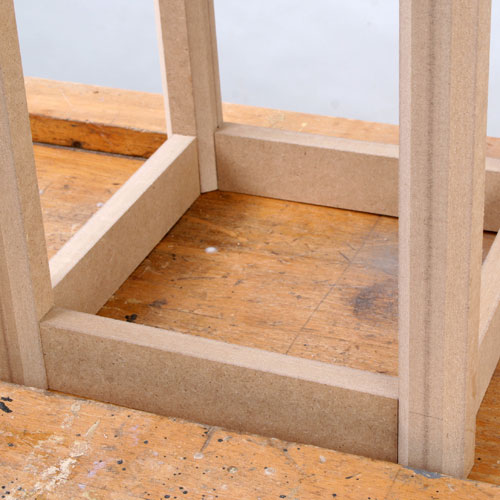
At regular stages throughout the construction of a project, no matter how simple, I always like to make a dry assembly to be sure everything fits correctly.
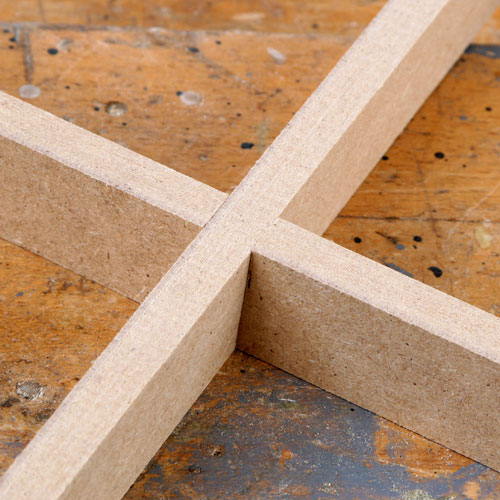
It is far easier to rectify a mistake at this stage rather than when you have everything covered with glue at the final assembly stage, and you cannot beat seeing it properly assembled to spot measurement errors. It also allows you to measure the length of the diagonal cross rails, which are two more bits of MDF with a simple cross halving joint.
These have to be thinner because they are joining in to one of the narrow leg faces and I simply thicknessed them down to the required size. However, as soon as you cut away the hard surface layer of MDF you do leave a much rougher surface that is hard to finish properly later, so where possible always try and work with MDF at its manufactured thickness.
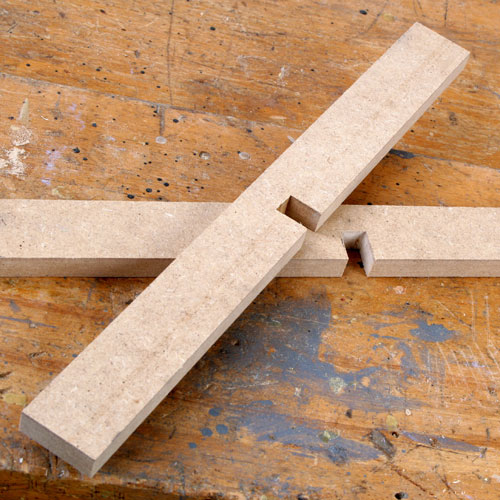
The biscuit slots to join in the diagonal rails are cut in exactly the same way as the top rails, but it does help to clamp several legs together to provide more support for the router base.
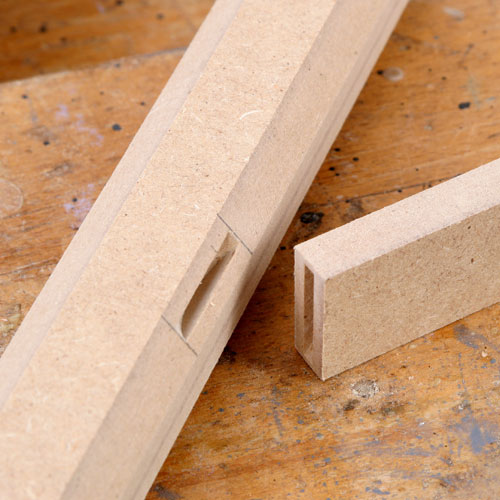
The ends of the rails are cut similarly and again you have to make your own tiny biscuits.
Dowels are another alternative but I prefer biscuits on the grounds that they do not require me to work quite so accurately!
Take care with the halving joint to get it is tight as possible, but bear in mind that thin sections of MDF are relatively weak; don´t make it so tight that you have to start hammering it together or something will break.
Step 3 - Glueing and Table Top Construction

It´s now ready glue up and clamp, but don't go mad with the clamping or you will distort the rails by over tightening and the whole thing quickly goes out of shape.
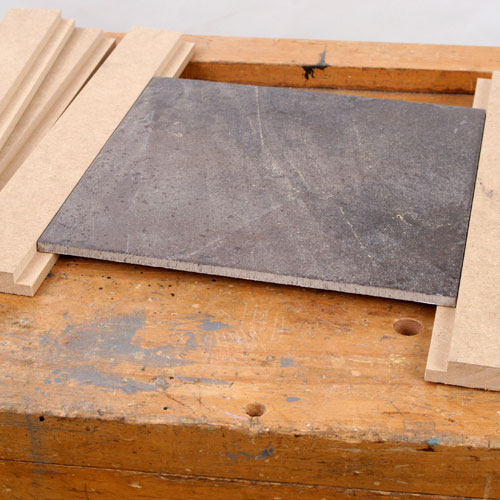
Whilst this is set aside to dry, you can concentrate on making the top. This is just a rebated frame into which the tile sits loosely. The rebate is cut using a bearing guided cutter, adjusting the depth so that the tile is fractionally proud of the frame, though this is difficult to judge when the tile in relatively uneven like this one
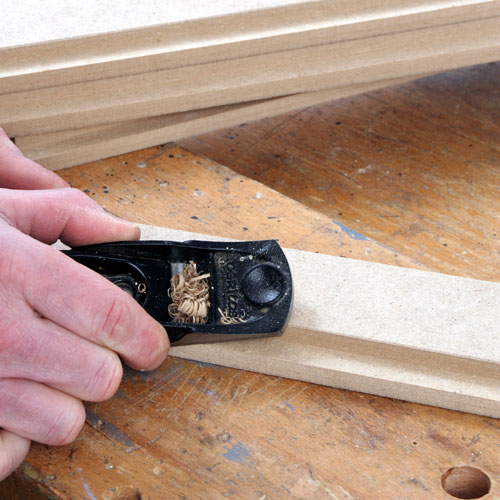
To reduce any obvious step between the tile and the frame, use a block plane to run a tiny chamfer along the inside edge of the frame components. Don´t overdo this, but just a small angle makes all the difference to minimize the feel of any discrepancy.

The frame components can then be mitered and biscuit jointed in the same way as all the other joints, but now at least you can use standard sized biscuits.
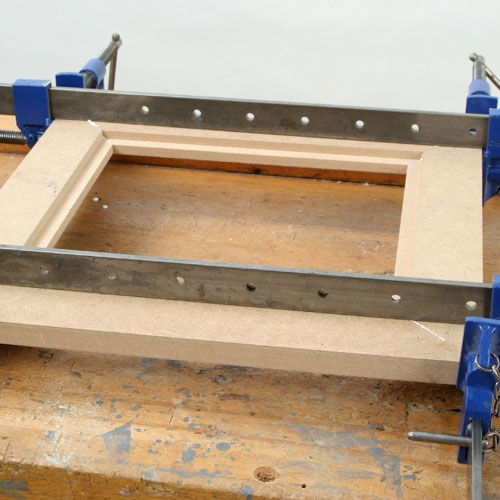
Gluing up mitered frames is always something of a problem as they tend to slip about as you tighten the clamps. Provided the joints are accurate, you should only need minimum pressure to hold them together and I find that if you put the clamp faces right at the corner of the joint this should stop any movement.
Once the frame is dry remove it from the clamps and run the 45 degree chamfer cutter around the outer edge to make it look thinner and lighter.
Step 4 - Finishing touches
Finishing MDF is always something of a problem, as the machined surfaces rough up as soon as you apply any form of paint.
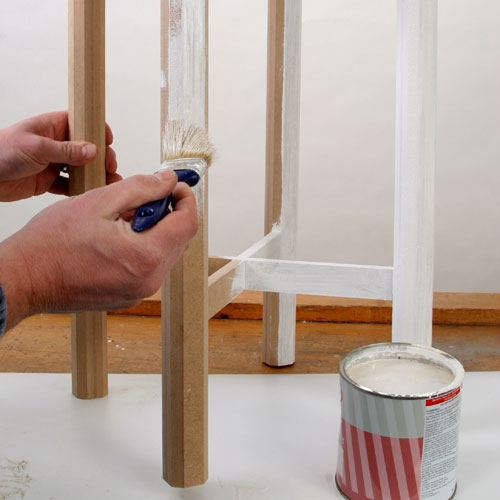
I now start with an initial coat of conventional gloss undercoat, brushing it quite vigorously to make sure it penetrates the surface.
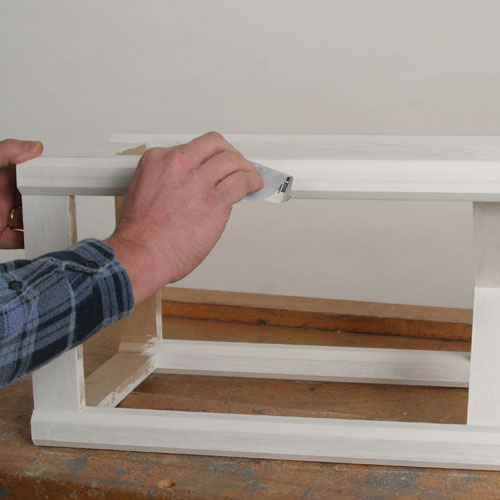
Allow this to dry thoroughly full at least 24 hours and then rub it down the 240 grit abrasive and should end up the silky smooth surface ready to except the final finish. For my table I use two coats of cream eggshell paint and then a single coat of matt varnish as a glaze.
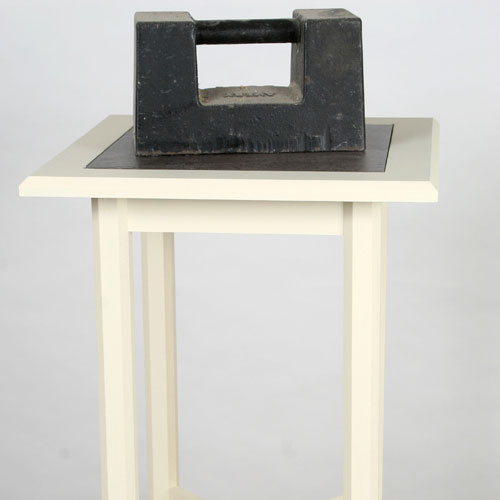
With the legs and top frame both painted I just glued them together using a weight as a clamp, but left the tile loose so it could always be changed with the surrounding decor.
This is the completed contemporary side table routing project.