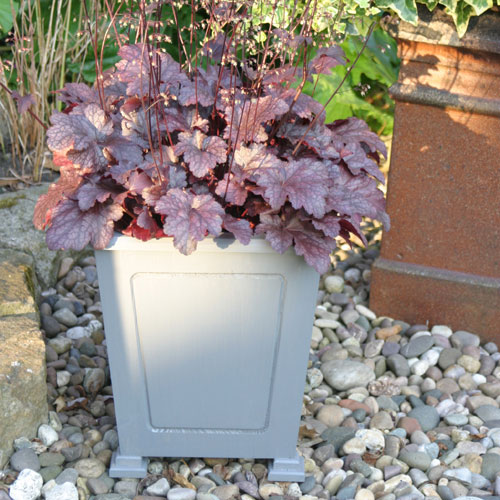
Planter Routing Project
A tapered planter which would add a touch of class to any patio area!
My work these days tends to be a mixture of both one-off items and the occasional small production run which helps to keep the job interesting and provides plenty of variety. A recent request was a quote for the supply of a large number of tapered hardwood planters. In these situations, where the numbers involved are very high, and the potential financial implication it you get the costings wrong are equally great, I always prefer to minimize the risk and make up a sample first.
As well as allowing you to see whether a design on paper actually works for real, it also gives you the chance to make up any necessary jigs and templates and test them out on the actual project. With the sample completed you are then in a much better position to assess just what is involved as regards time, possible complications and material usage.
Step 1 - Preparing the Timber
Although the planters are to be made in hardwood, as yet unspecified, I usually make up samples from softwood as it is so much cheaper and there are usually enough scrap odds and ends lying around the workshop anyway.
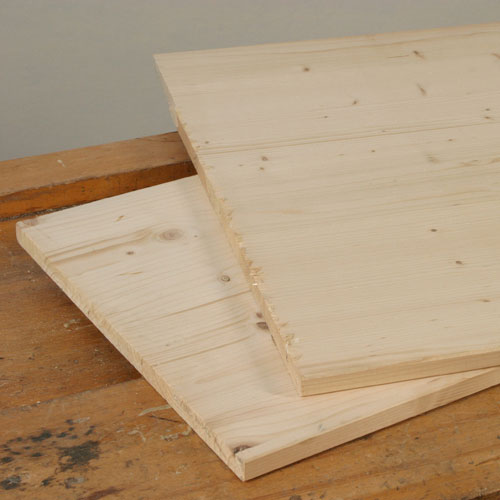
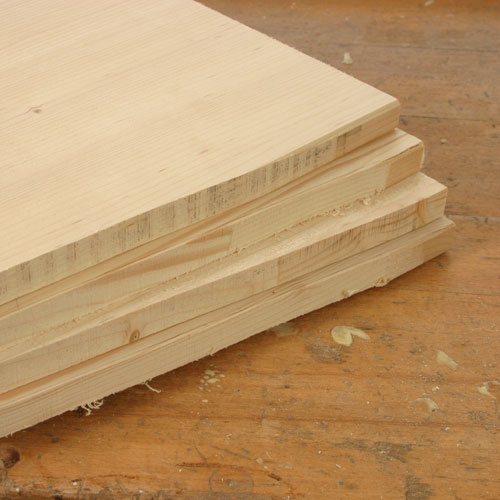
I managed to find a couple of offcuts of laminated pine boards that were just big enough for the whole job.

Although the sides are all tapered, I started off by cutting them to exact width using a fine toothed blade on the circular saw, This is an ideal way of thicknessing wider boards, but if you are restricted to the use of power tools only, try clamping all the sides together and planing them up as one to get them identical.
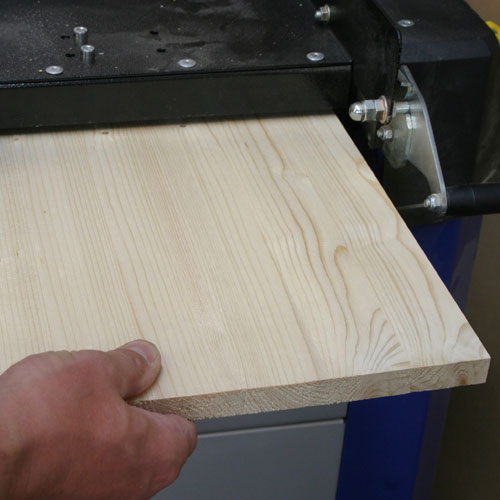
Although this laminated board is theoretically flat, I find that the surface is actually always slightly corrugated, particularly if it has been lying around for a while, so run it through the thicknesser to get it perfectly true again.
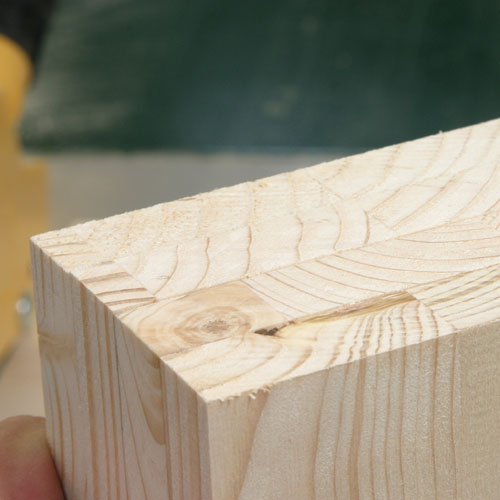
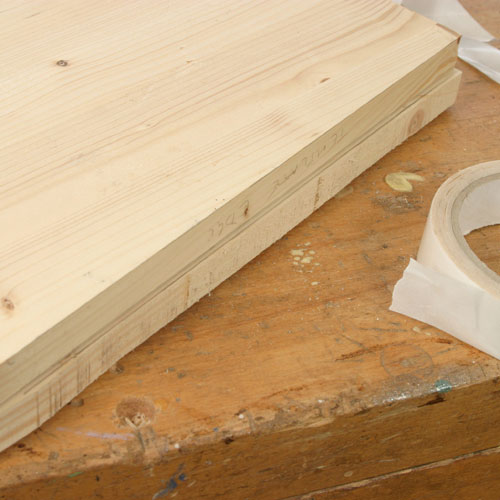
With the edges and surfaces flat and true, you now stand a good chance of cutting them to accurate length, but check by holding them all together on a flat surface to highlight any discrepancies.
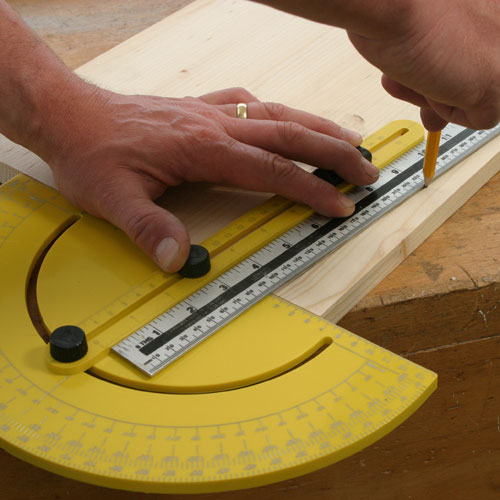
The sides taper in by 5 degrees so mark this on one edge using a straightedge and a protractor, and then rip off the waste just clear of the line.
I used the bandsaw as the quality of cut isn´t critical at this stage. Repeat the procedure on all the other sides using the first one as a pattern, and then plane just one of the edges perfectly true to the line.
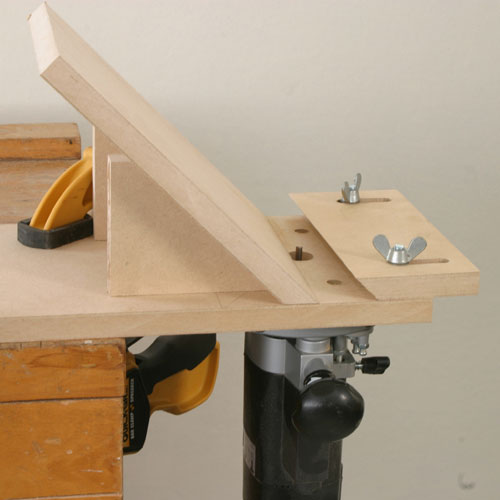
This can then be used as a template to true up all the others using the router and an appropriate straight bearing guided cutter. Use some double-sided tape to fix this template piece to one of the others.
Step 2 - Routing Applications
Now the timber is prepared, certain routing applications need to be done to form the outer design of the planter.
The bit is a proper template following cutter, with a bearing mounted at the top.
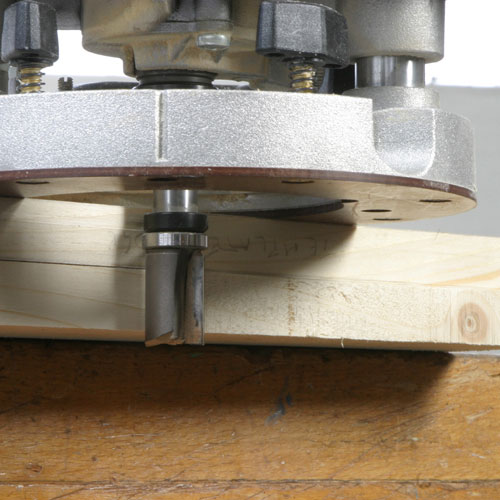
With the template on top of the untrimmed workpiece it is now just a question of running the router down the edge to trim it back perfectly to match the template edge.

Keep repeating this procedure to trim up all the pieces to be a perfect match. Because they are to be joined with a long mitre joint, it is vital they really are perfectly matched as any discrepancies will be highlighted if the joint cannot close up properly.
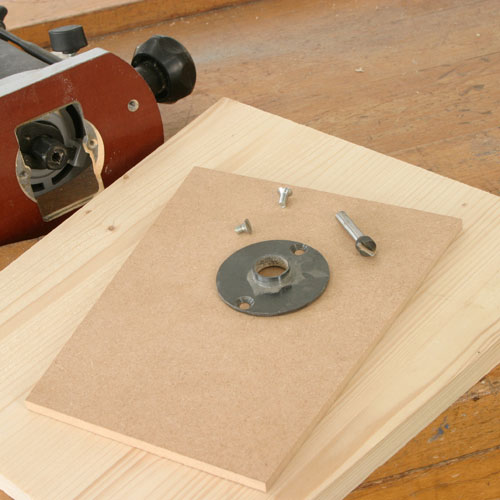
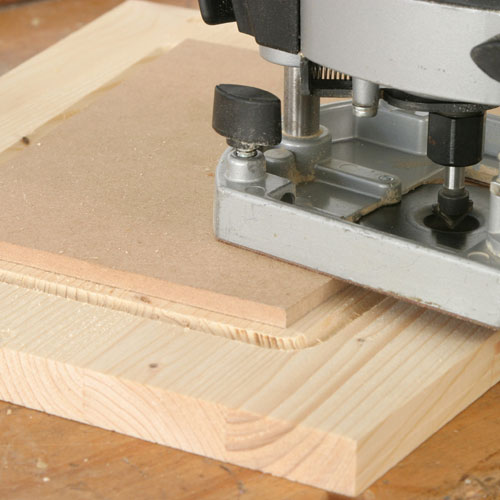
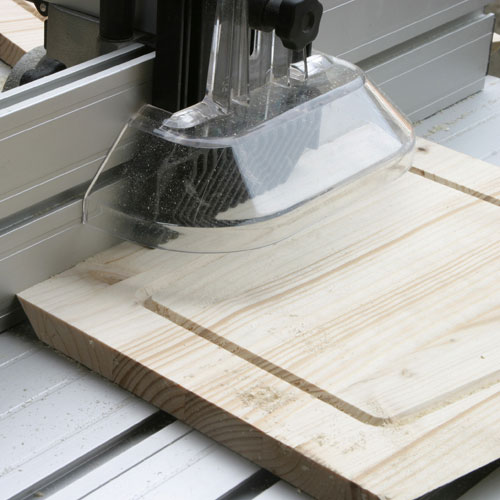
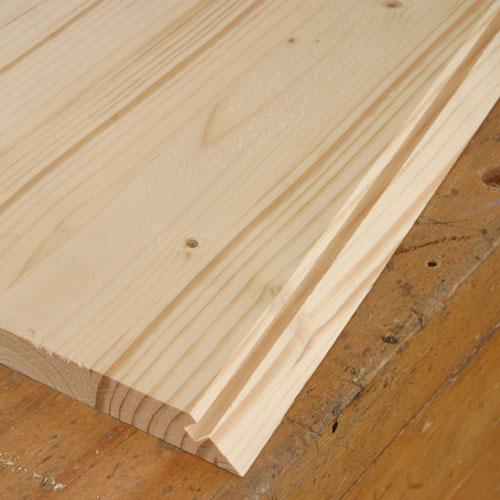
The sides are all decorated with a small Vee cut line giving the hint of a panel and for this you will need another template cut to the appropriate shape and a guide bush fitted to the router.
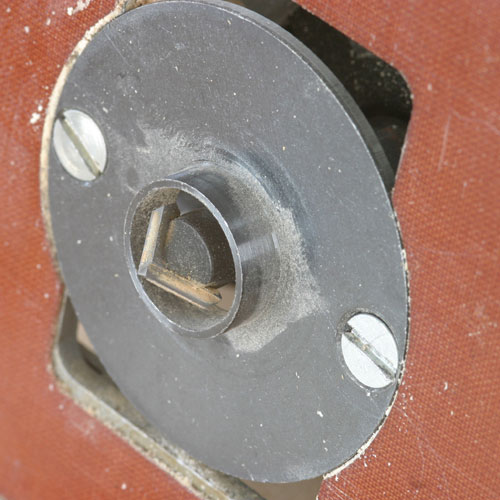
Choose a bush as near as possible to the maximum diameter of the cutter to minimize the amount of template offset required.
This business of template guides, cutters and offset seems to cause an immense amount of confusion amongst beginners to routing but in fact it is actually very straightforward. The technical term for the difference between the diameter of the cutter and the guidebush is the 'guidebush margin', and to calculate it you need to subtract the cutter diameter from the outside guidebush diameter and divide the result by two. You can then make your template appropriately over or undersized depending on whether you are using it as an internal or external template.
It helps to take the cutter down in several passes making only a light cut each time, as you are then not trying to force the router forwards and keep it in contact with a template at the same time. Remember to work clockwise round an internal template, and anticlockwise round an external template. In this case, the finished pattern was quite modest, but sometimes less is more, it is so easy to get carried away with over-elaborate designs.

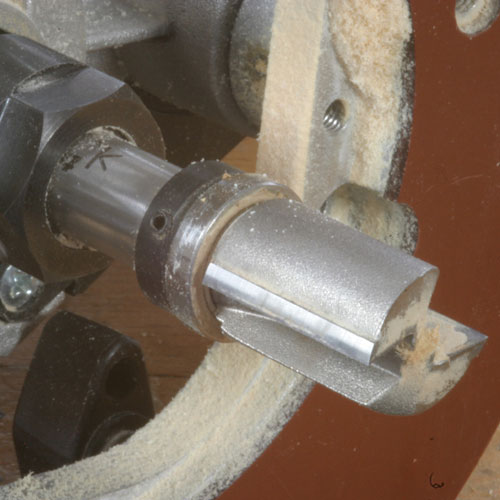
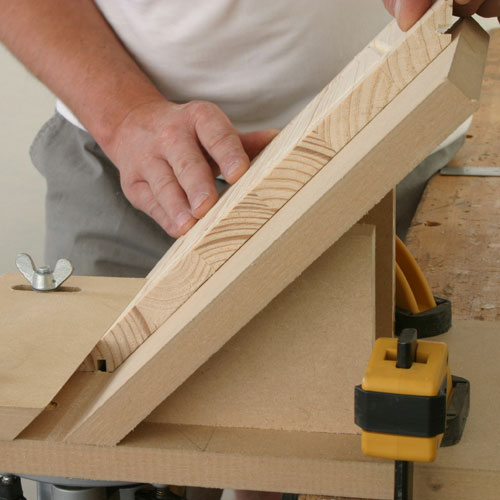
Cutting a superbly accurate mitre on the edge of a panel is the next problem and although you may be able to do it by hand, I am just not that good, so again the router comes into play. For this you need a 45 degree chamfer bit in the router mounted in a table and although the bit I used is a bearing guided one, this is not strictly necessary, it is just the biggest chamfer cutter I have.

With the cutter mounted in the router, select a suitable table insert to provide maximum support and also bring up the fences as close as possible.
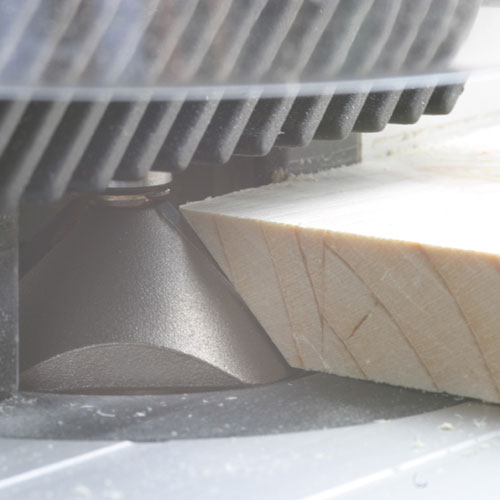
The cut needs to be perfectly straight and keeping these fences up tight makes quite a difference, particularly when you reach the end of the cut. The height of the cutter need to be adjusted to produce a perfect angle across the full width of the edge.
Remember that there is then only a knife edge of timber running against the outfeed table fence so don´t press on too hard or you will round it over.
Step 3 - Carcas Construction
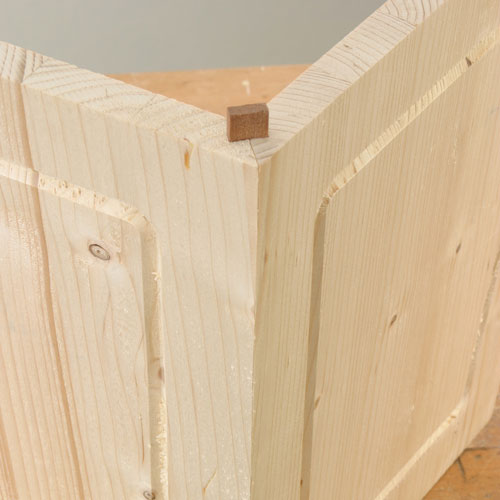
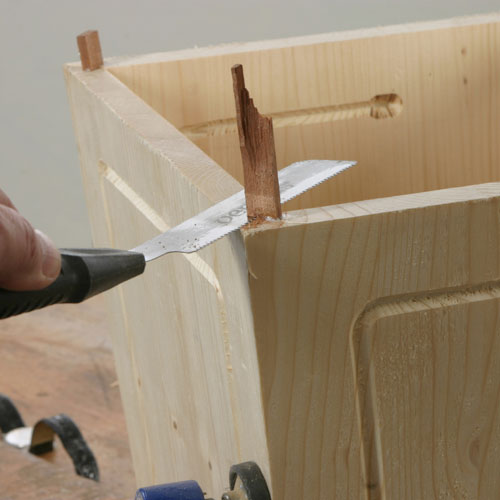
Although the mitre joined in an excellent one in that there are no exposed panel edges, it is also inherently very weak and equally difficult to assemble without any form of strengthening. For this job I have made up a splining jig, which cuts a slot along each mitre edge to accommodate a loose tongue or spline.
The construction of this jig is described elsewhere in this issue, and although taking several hours to make, the effort will be more than repaid if I eventually get the job and there are hundreds of planters to be made.
Adjust the depth of the groove to provide a reasonable amount of support, but not so much that it weakens the corner.
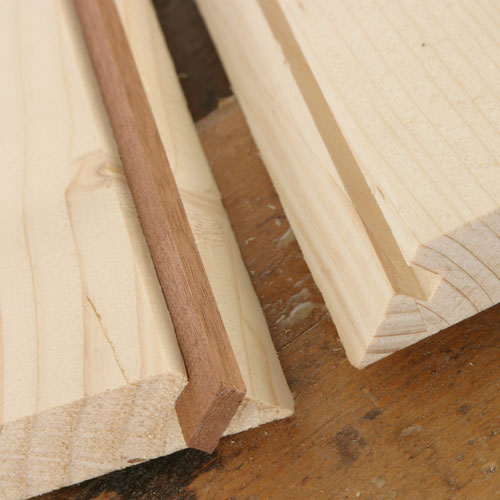
Then, machine up some strip material to form the splines, This needs to be a gentle push fit in the groove. Don´t make it so tight that it has to be hammered in or you risk breaking off the corner and will also have great difficulty at the assembly stage. Remember too, that when you apply glue to the wood it will swell a little as well, so splines that are slightly slack rather than tight is the recommendation.
As the end of the joints will be hidden in the finished job it also helps to make the spines slightly narrower than the combined depth of the two grooves so the joint will pull up tight. Do a trial assembly to make sure this is the case, and trim the width of the splines if necessary.
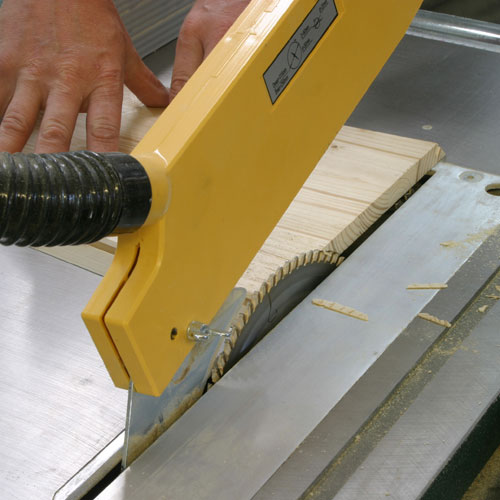
Before you assemble the whole thing, the top and bottom of each panel needs to be trimmed at 5 degrees to bring them horizontal, again a simple job if you have a circular saw, but use a fine toothed blade to avoid spelching the mitred edge.
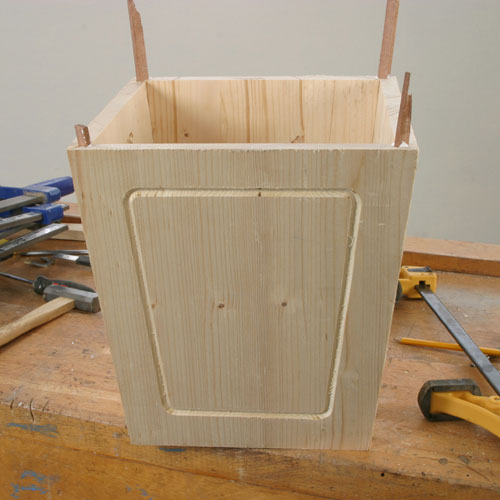
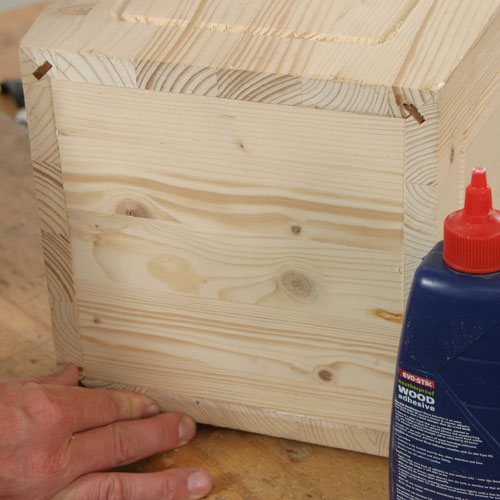
With the edges all cut accurately and the splines perfectly matched, the joint goes together very well and will almost hold on its own.
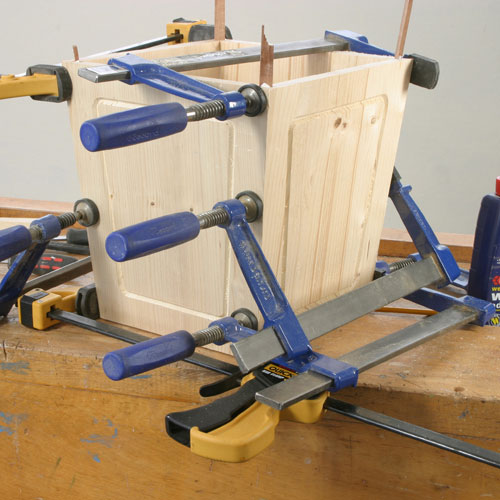
A few strategically placed clamps may be necessary to close any gaps if the wood is at all distorted, However don´t over do the clamping or you will close one edge, but open up another.
Whilst the glue is setting, machine up the top trim from some offcut material, chamfering the two top edges at 45 degrees with a bearing guided bit.
When the glue has fully cured, cut off the excess splining using a flush cutting saw, and then plane it totally flat using a small block plane.
Step 4 - Assembly and Finishing Touches
The planter now must be firmly assembled with some final additions to improve the presentation.
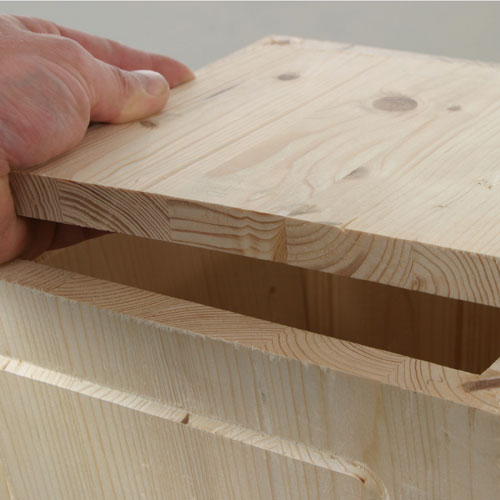
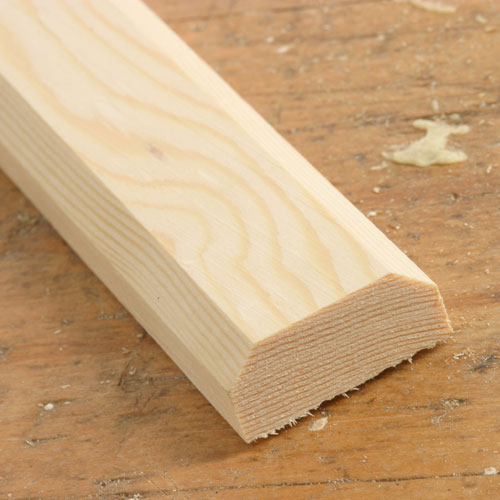
The base is just a piece of square softwood with the edges chamfered at 5 degrees, but obviously it has to be dropped in from the top.
Trial and error is possibly the best way to get a perfect fit taking a fraction off any two adjacent edges until it ends up locking in tight and flush with the base.
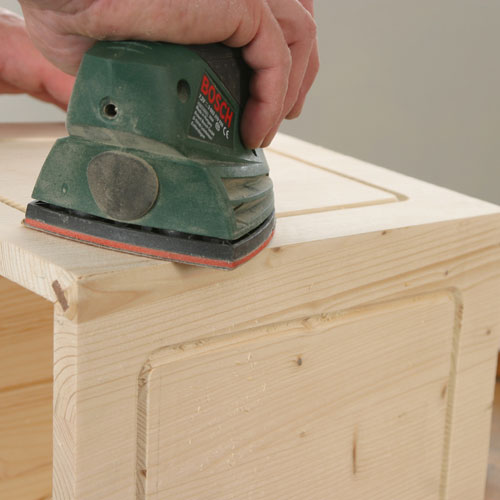
Now is a good time to give the whole thing a thorough sanding, cleaning up any raised grain and chipping round the panel cuts.

The feet are just two small blocks stuck on top of each other, I used superglue for speed and convenience. The top edges of each of the blocks have to be chamfered at 45 degrees as well and I struggled for some time working out how to use the router safely on such a small component. It is too small to run the router round handheld and I didn´t fancy working them on the router table.
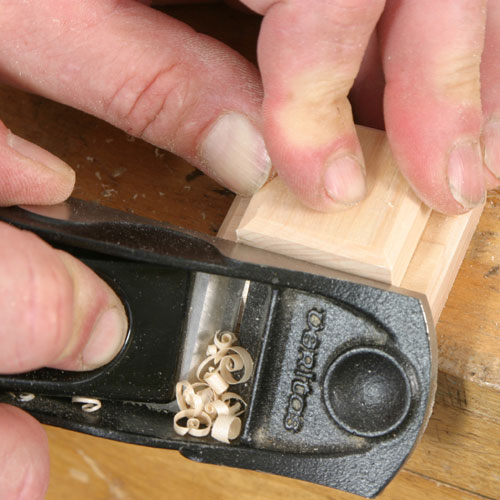
In fact I eventually realized that it was very much easier to just plane the chamfers using my low angle block plane. Sometimes it is hard to think outside the power tool route and remember that hand tools are often quicker, easier and much more effective!
The blocks are glued and screwed in place using brass screws as steel ones would soon rust in contact with the wet ground.
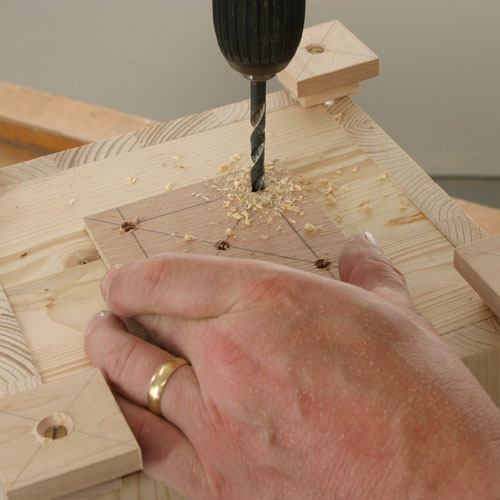
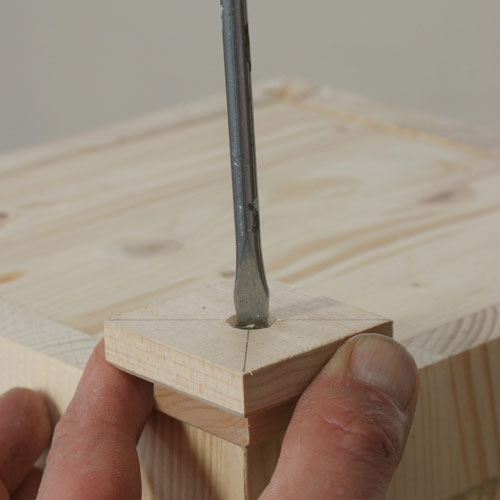
Although the planter is designed to accommodate an internal liner I was slightly concerned that moisture could collect in the bottom so drilled a pattern of drainage holes, again using a template for speed and consistency.
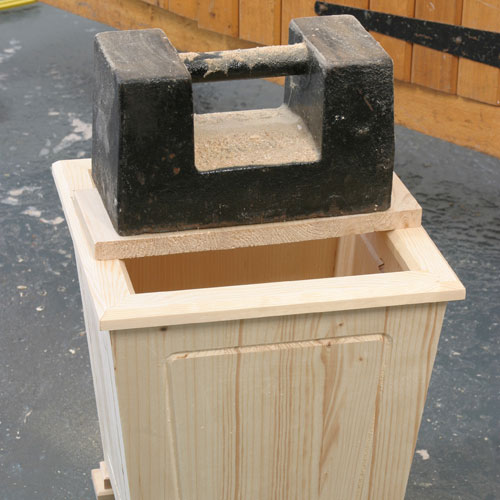
The top trim is mitred and pinned together and then simply glued in place with an appropriate waterproof glue, using a heavy weight to provide the necessary clamping action.
The finished result was actually better than I though it would be, and with all the jigs and templates made, should be relatively simple to mass-produce quickly, though I am very glad I went through the process of making the sample to get a reliable timing.
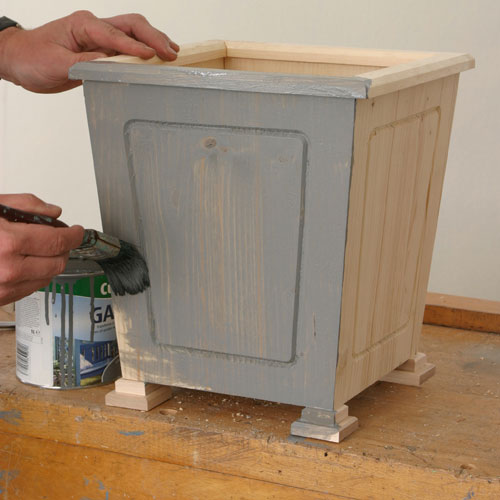
Hopefully it will also prove acceptable to my clients, but meanwhile after a couple of coats of coloured preservative, it is firmly ensconced in my garden, possibly to become a testament to another missed opportunity!

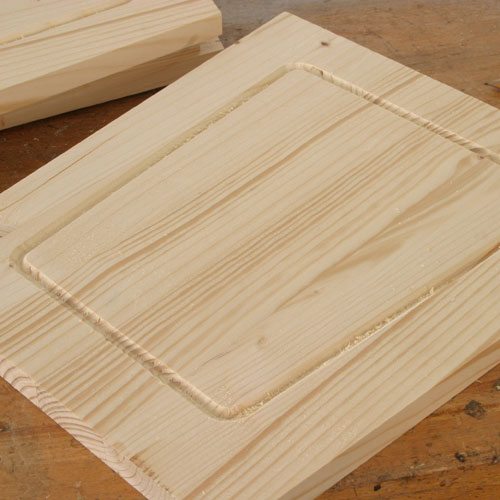
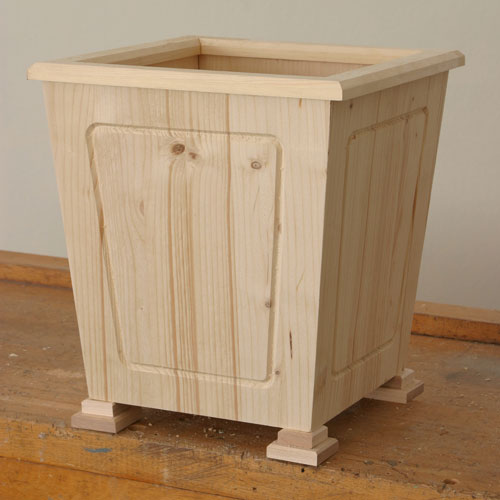
This is the completed Planter Routing Project.