Coffee Table Routing Project
How a workshop clear-out resulted in a coffee table project, made from discarded mdf offcuts.
One of my very occasional, but ruthless, workshop clear-outs recently resulted in a huge pile of seemingly useless offcuts of MDF and hardwood, all destined for the firewood skip.
I had also just been asked to produce a painted occasional table in a vaguely Arts and Craft style, so it seemed a good opportunity to try and use up some of the scrap and produce a decent piece of furniture into the bargain. As usual, my library of books is the first port of call to find a suitable design which I can then modify to suit. This one was the first that I came across and it seemed ideal.
It required all the pieces to be quite chunky, with sharp square edges and no fussy detail, for which MDF is the perfect material. I know that many people have issues with it, but to my mind it is the unbeatable for painted work, provided you take sensible safety precautions for the hazardous dust produced as you work it. What else can you use to produce sturdy furniture for only minimal cost? Full 8 x 4 sheets of MDF cost less than £20, even for the thicker sizes, giving you a chance to make some serious profit on the finished job.
Step 1 - Select and Prepare Timber
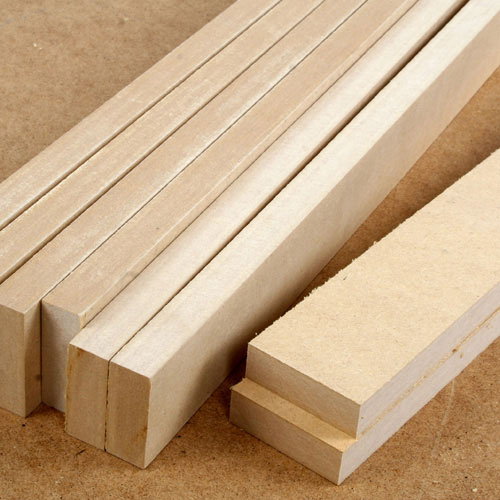
The thickest material I could find was 25 mm, so for the legs it is necessary to laminate up two thicknesses to produce the required 50 mm.
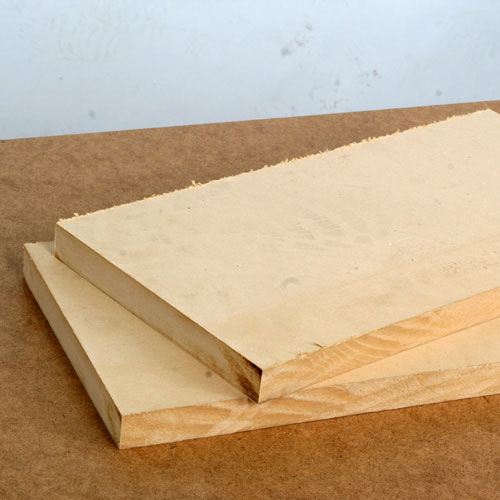
Cut the two pieces slightly oversize, to allow plenty of room for the subsequent sawing and planing cuts to produce the four square legs.
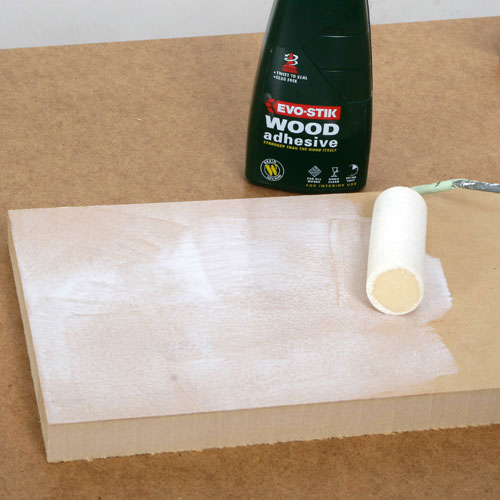
On gluing jobs like this, where you have a big surface area to cover, it is much easier to get the glue spread evenly if you use a small decorator's roller. Provided you use the sleeves designed for gloss paint there is a very little wastage and the even coverage minimizes the glue line. If you use PVA glue, a quick wash in water is all that is needed to clean the roller afterwards.
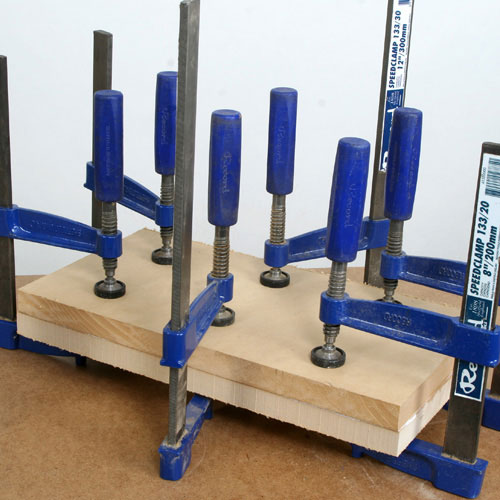
You will need to clamp the laminations firmly though, using plenty of cramps to make sure the two pieces bond together really tight all over.
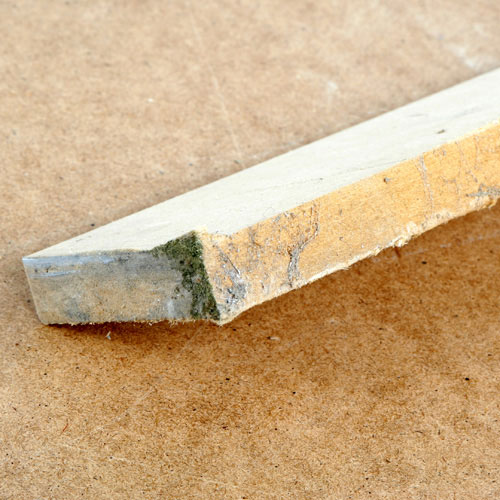
Whilst all that is setting, machine out the rest of the components from 18mm material. Although MDF as many advantages, one disadvantage is that it is not strictly resistant to moisture and if you have had boards lying around for sometime the edges will absorb moisture and swell significantly, particularly if they have been in contact with the ground.

If you have any suspect pieces like this, trim off a good 1" or so from the edge to get back in to good material that will be the correct thickness.
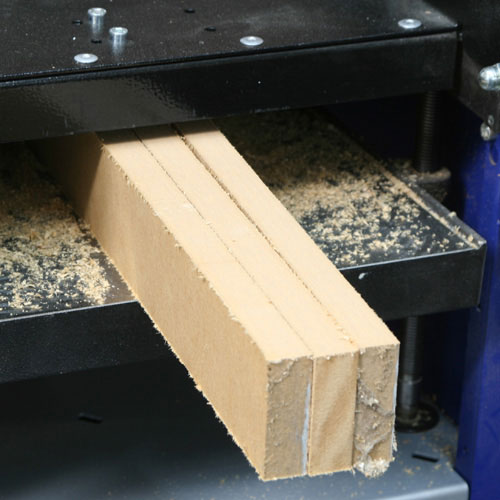
I used a planer thicknesser to reduce all the components to the required width, but bear in mind that MDF will have a severe blunting effect on the knives, so use an old set, or use just the extreme end of the cutter block, to leave the rest in good condition.

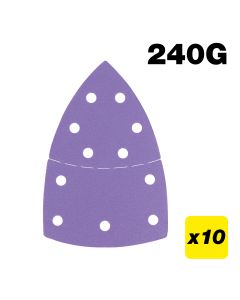
There are various qualities of MDF and the cheaper ones are much harder to machine cleanly. Even after planing, the edges can remain quite ragged, but this soon disappears after a wipe over with some 240 grit abrasive.
One of the problems of using up scrap material rather than taking it all from a single board, is that you end up with pieces of inconsistent quality. The MDF with a shiny, glasslike surface finish appears to be much denser and therefore easier to machine cleanly.
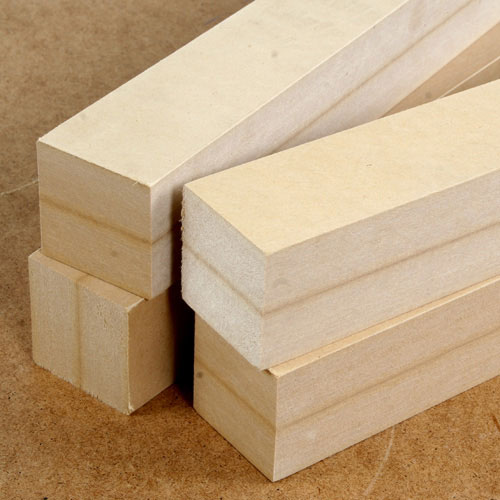
When the laminate for the legs has dried thoroughly, machine out the individual components and thickness them perfectly square; the glue line will be visible due to colour variation, but it will disappear under the first layer of paint.
Step 2 - Joining the Materials
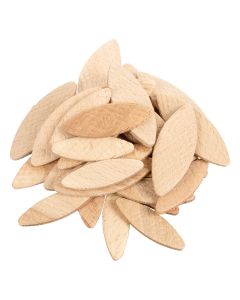
There is no point attempting any sort of clever joints with MDF and usually biscuits and glue is sufficient, but where the structure is to be a little more load bearing I prefer dowels, or even better, the fantastic Trend Beadlock system.
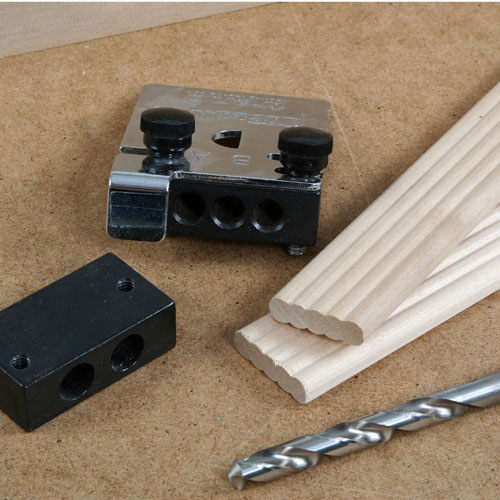
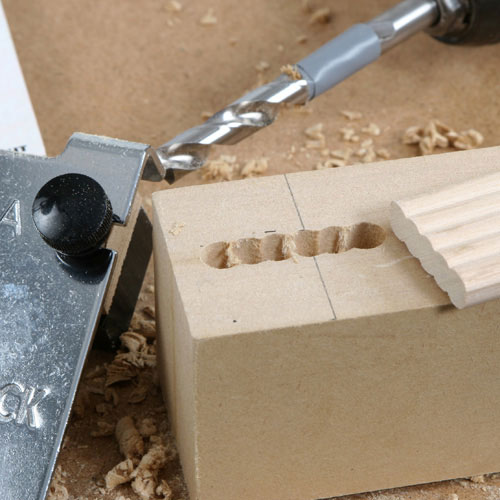
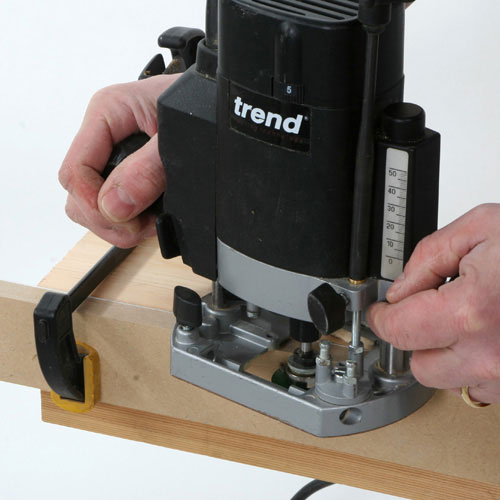
This very clever jig cuts a series of overlapping holes using nothing more complicated than a twist drill, and you then insert short length of preformed dowel to produce a very effective mortise and tenon joint.
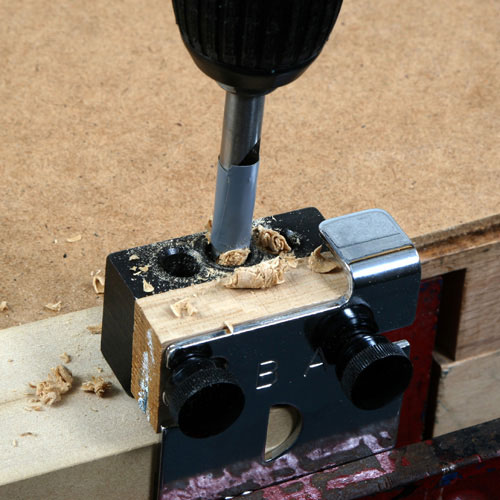
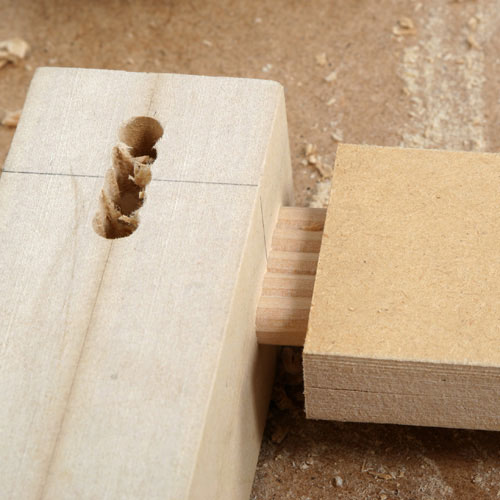
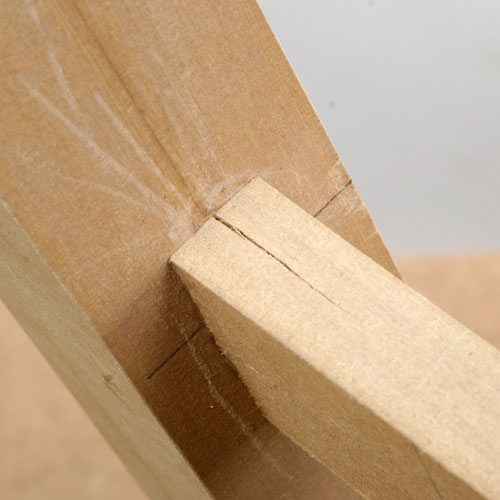
If you want to use the Beadlock jig on thicker material like this, it is necessary to pack it out using a hard wood shim to get the holes centred properly. This is a simple job and provided you keep the shims marked with their thickness, they will be instantly available for future jobs.
The jig accurately positions the holes, but you will need some form of stop to determine the depth. I just use a piece of tape wrapped around the drill bit as a guide.
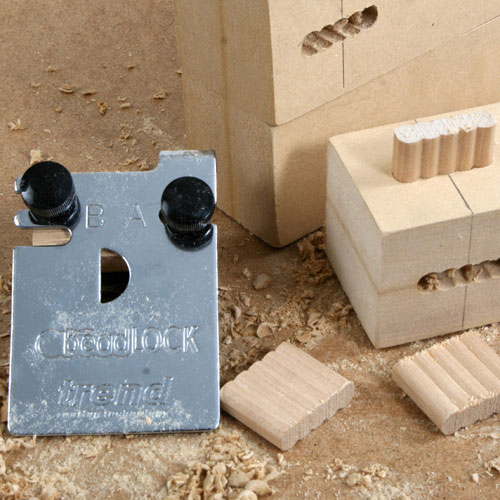
The preformed dowel is cut into short pieces and is a tight fit even without any glue. The same procedure is used to cut the matching mortise in the end of all the rails and provided you mark the centre line of each piece the jig is very simple to set up so that all the components line up correctly.
Remember that the alignment needs to be spot on; there is no room for adjustment like you get with biscuits.
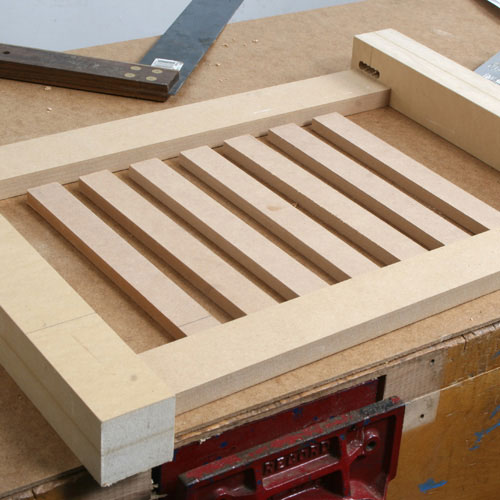
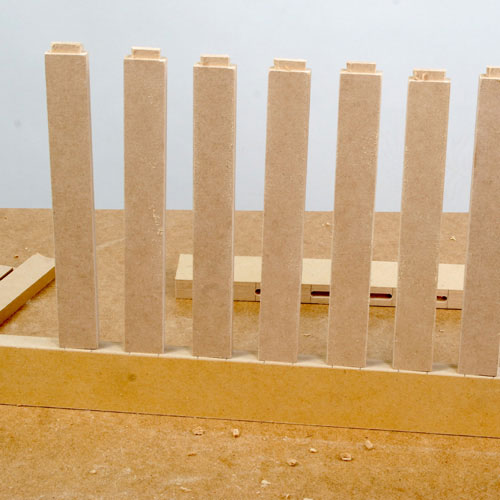
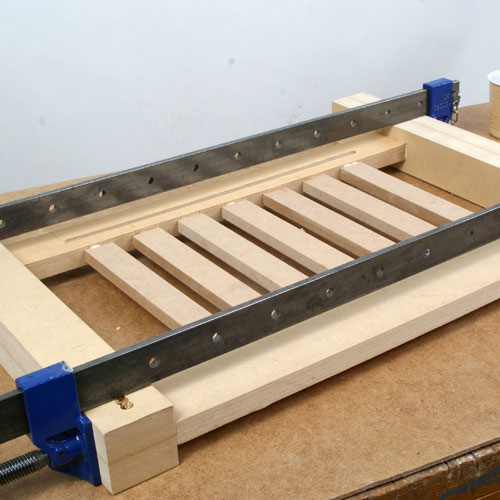
Lay out the legs and the end cross rails to so you can measure the exact length for the slats, which are cut from 12mm material. These are fitted into the rails with stub tenons, so they need to be over length by twice the length of the tenon.
Step 3 - Creating the Cross Rails
The next step involves measuring, marking and routing the cross rails of the Coffee Table.
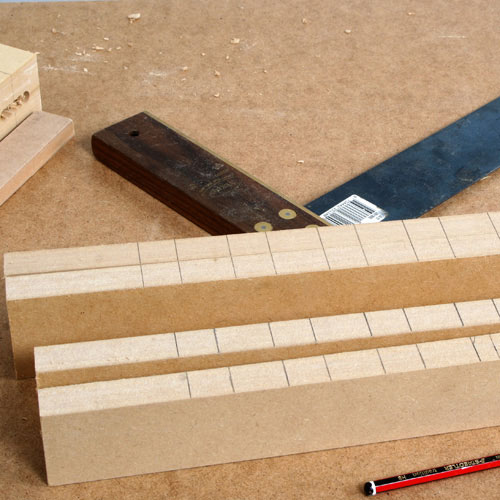
Mark out the position for each mortise on the cross rails, squaring the lines across all four of them at once to get the spacing consistent.
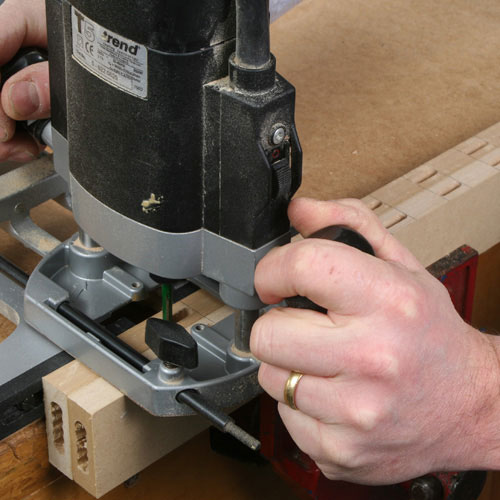
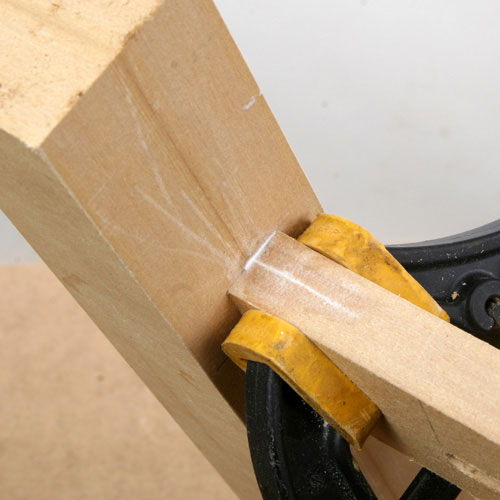
The mortices are cut by plunging the router in and sliding it along between the marks. If you clamp several pieces together in the vice it provides a much more stable platform to rest the router on and stops it tipping.
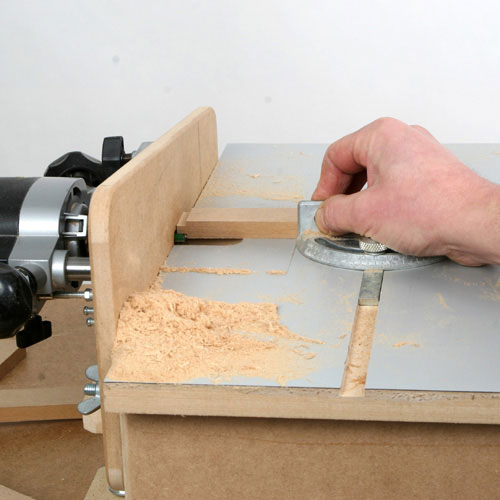
The tenons are cut using the horizontal router table that I had constructed many years ago. This is one of the most useful pieces of kit I have ever made and has seen a lot of work in the meantime.
It is absolutely perfect for this sort of job, as it allows the necessary fine control and good visibility to ensure the tenon shoulders are perfectly matched on all four faces of the slat.
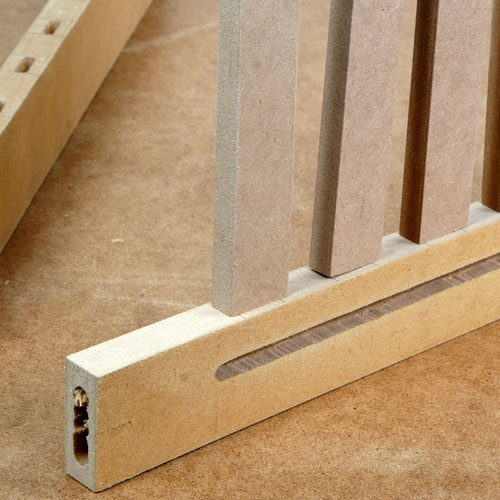
The lower shelf is supported on a long loose tenon in the lower cross rail, and again this is easily cut using the horizontal router table.
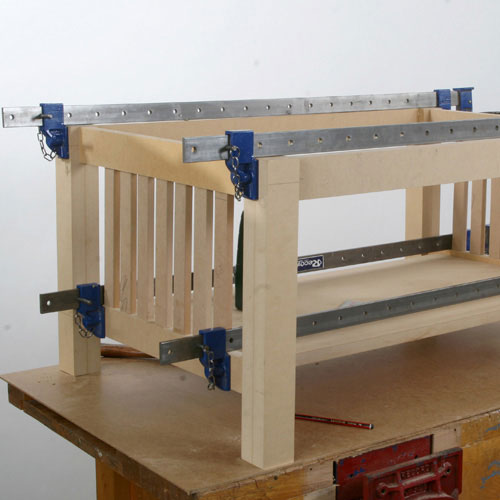
Step 4 - Assembling the End Frames
Once all the machining is done, the two end frames can be assembled and glued.
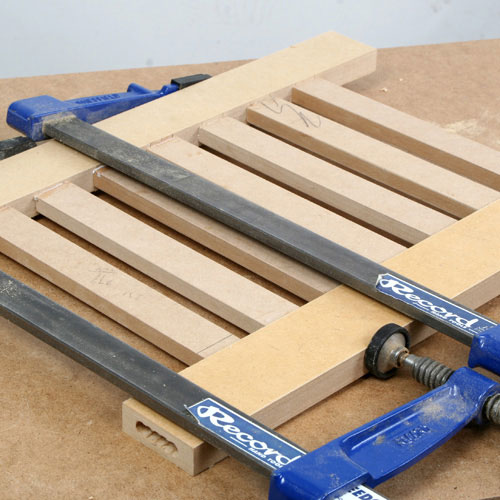
Make sure it all stays square as you apply the cramps, as MDF is easily distorted with too much pressure.
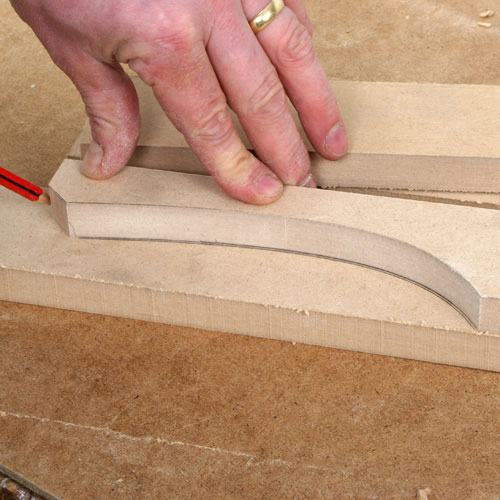
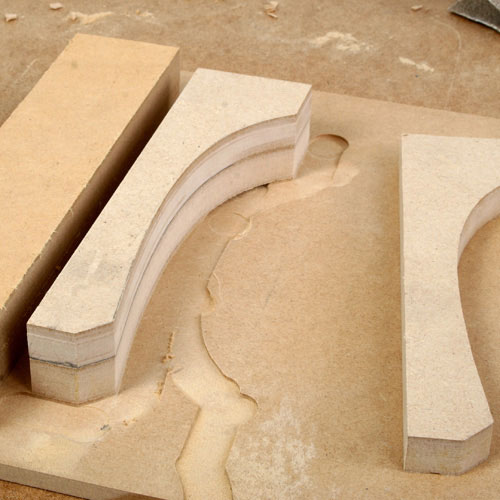
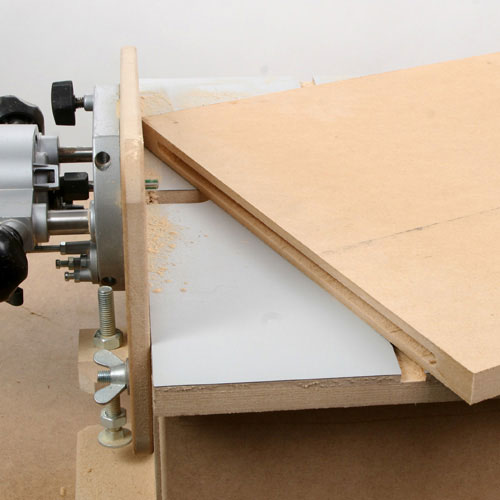
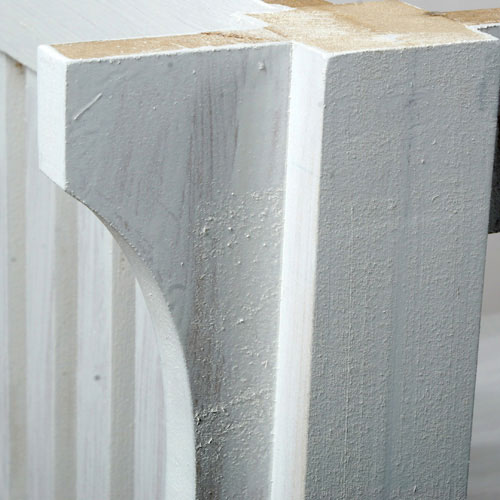
The decorative end brackets fitted onto the legs are a simple shaping job using the bandsaw and a bobbin sander. Make a good job of the first one and then use it as a template to mark out all the others. Cut them slightly oversize and then use this template as a guide to rout out three more identical ones.
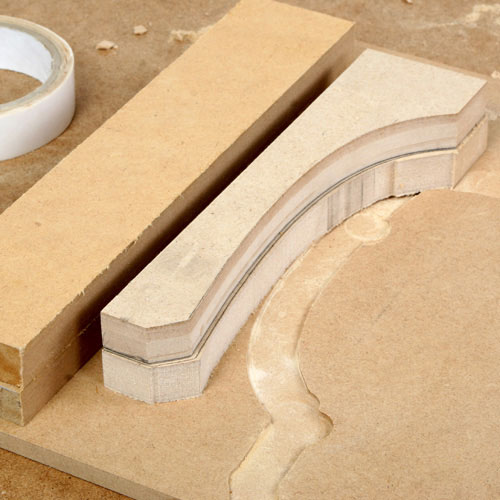
For this, the template is stuck with double-sided tape to each rough cut shape and then held in place on a work board, again using double-sided tape
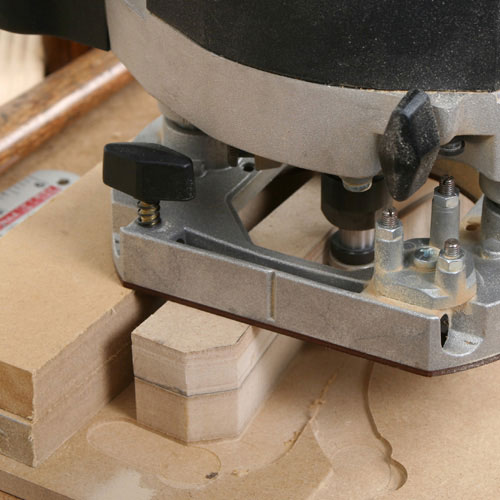
Alongside, fix a support block of exactly the same thickness as the two brackets to prevent the router tipping as you work.
As the bearing on this particular cutter was top mounted, I had to cut into the work board a few mm to get a clean finish. If you use a bottom mounted bearing trimmer, stick the template under the workpiece and you will not then need this sacrificial work board.
Step 5 - Joining the End Panels to the Legs
The next stage involves joining the pannels to the legs.
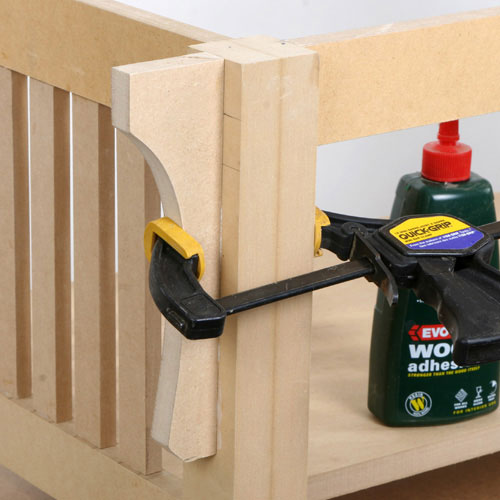
As soon as the end panels are dry they can be glued into the legs and only light cramping pressure should be needed to hold the joints closed.
Another disadvantage of MDF is it has a very little shear strength and you may find that fitting the dowels into the end mat cause the narrower rails to split.
If this happens don´t panic, just wipe in some glue and clamp the split back together again and no one will ever know.
The bottom shelf is cut to size and the matching groove for the loose tenon routed in the end using the horizontal router table.
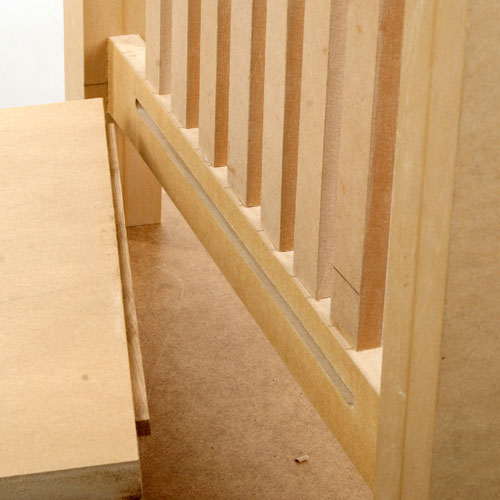
The tenon is a piece of hardwood machined to be a sliding fit in the groove and provides a strong joint across the whole width of the shelf.
Step 6 - Attaching the End Frames to the Rails
The frame then needs to be attached to the rails, and painted for a good finish.
Now you can glue the assembled end frames to the long rails and bottom shelf, again using only gentle cramping pressure as the tenons are a firm fit on their own.
The end brackets can be just glued in place, but I strengthened the joint by adding a couple of biscuits.
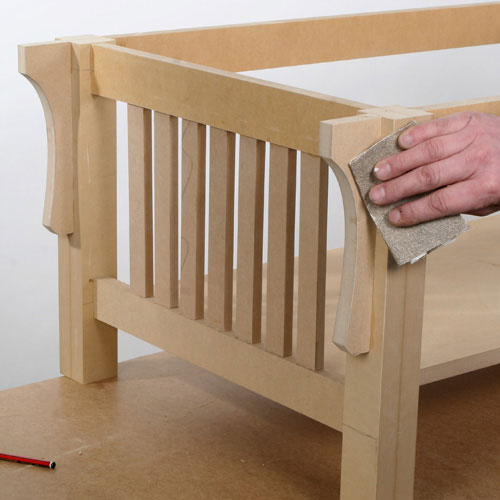
The whole concept for the design was that all edges remained sharp and square but painting is much easier if the extreme sharpness is removed with some fine abrasive paper, but don´t overdo this or you will spoil the effect.
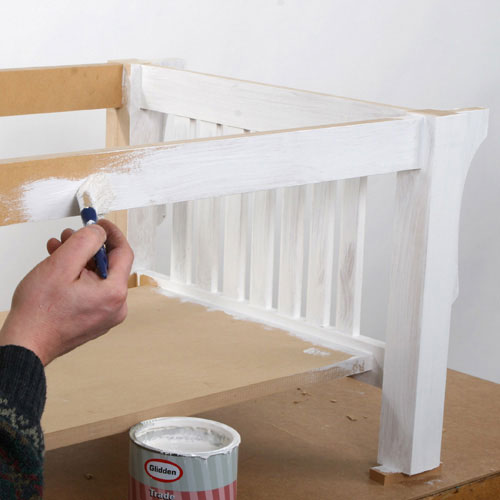
MDF is notoriously difficult to finish properly, but I have always found that provided you prepare properly and take your time, you can get a good paint finish, even on the fluffy machined edges. Start by applying a coat of good quality gloss undercoat, working it well into the surface with a brush. Allow this to dry at least overnight and you´ll find the surface has become extremely rough, but at least it is now well sealed and stable.
Sand this down with some 240 grit paper to remove the roughness and apply several coats of eggshell paint in the required shade. This should go on much more smoothly, but will probably need de-nibbing between coats. Three or four coats will eventually give a perfectly silky smooth finish, far removed from the startlingly rough result of the first primer coat!
Step 7 - Making the Hardwood Top
The solid hardwood top is a straightforward gluing up job. It then has to be attached to the rest of the frame.
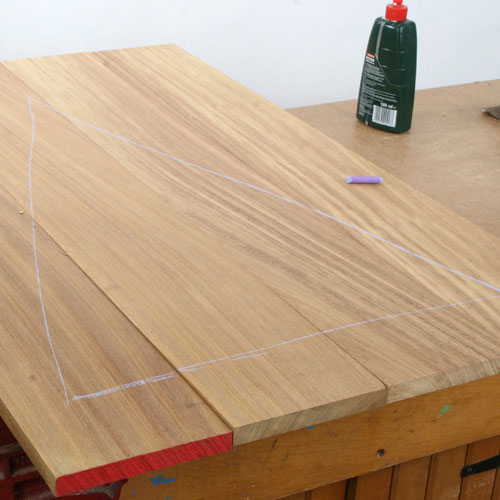
I used four boards of Iroko, machining the edges carefully on the planer to get perfect joints and then arranging the boards for the best grain effect.
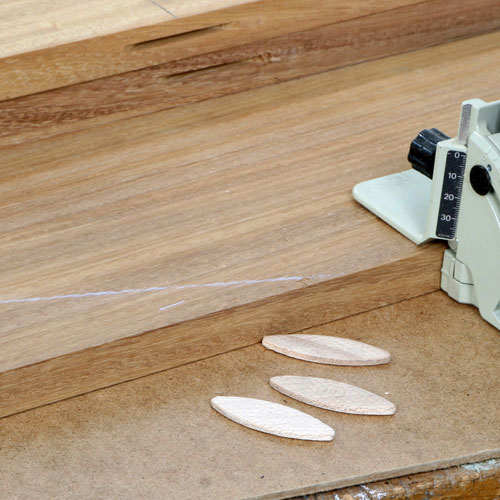
When you are happy with arrangement, mark the top with a large "V" in chalk to allow you to re-orientate them correctly again later and then cut three biscuit slots along the edge of each board.

Clamp it all together firmly, but don´t rely on the clamps to pull up poorly fitting joints; you need to get them right in the first place or the top will split at some stage in the future as the stresses are released with changing humidity conditions.
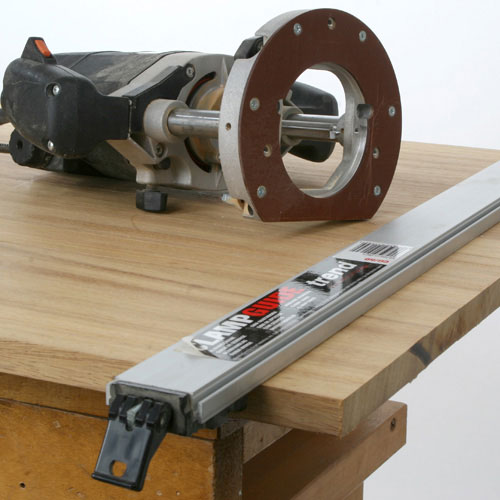
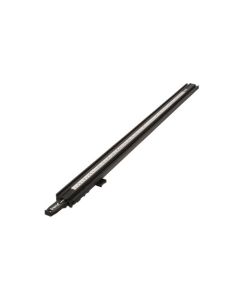
When it´s dry, trim the ends straight and square edge using the router and a suitable straight edge such as the Trend Clamp Guide.
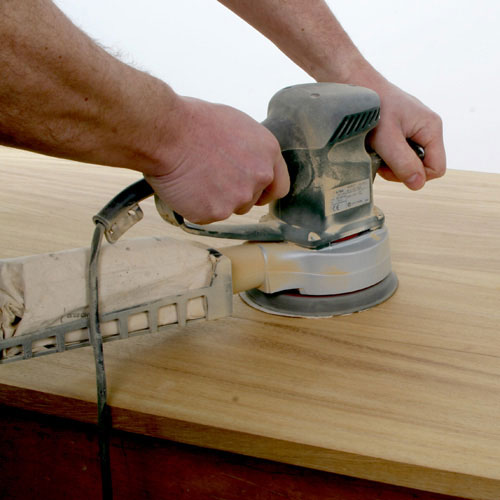
The joints on the top should be perfectly flat, so all you need to do is work over it using a random orbit sander to produce a super smooth finish, working down the abrasive grades to finish at about 320 grit.
The top is held to the rails with wooden buttons in slots to allow it to move without distorting. These slots are cut in situ using a grooving cutter in the router, with a temporary block clamped to the rail to provide support for the router base.
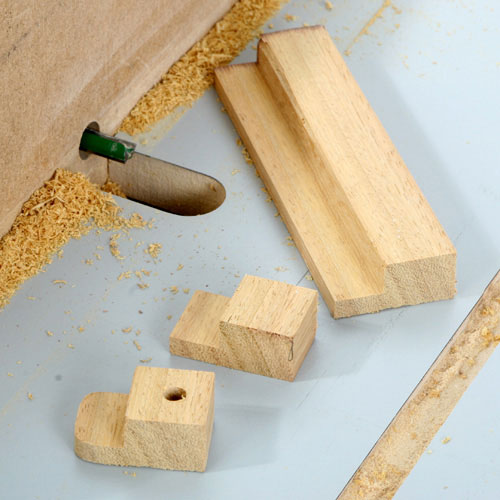
The buttons themselves are routed as a strip on the horizontal router table and then cut off individually and shaped and drilled to fit the slot. Two slots in each side rail and one either end should be sufficient.
The top is finished with three coats of brushing lacquer, de-nibbed between coats and then finished off with pastewax applied with 0000 steel wool and buffed with a rotary buffer. Remember to seal both sides of the top or it will cup.
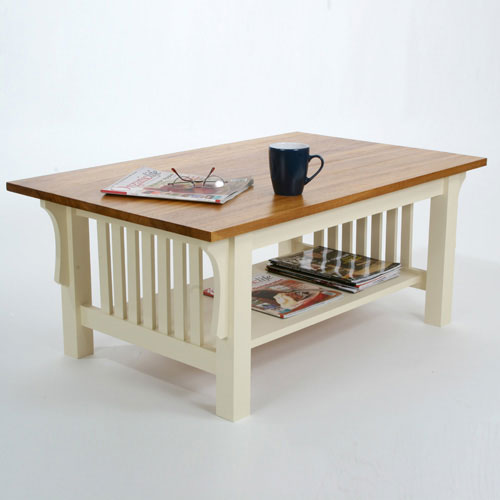
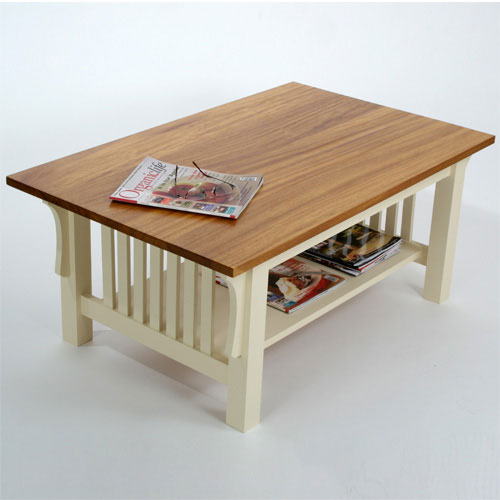
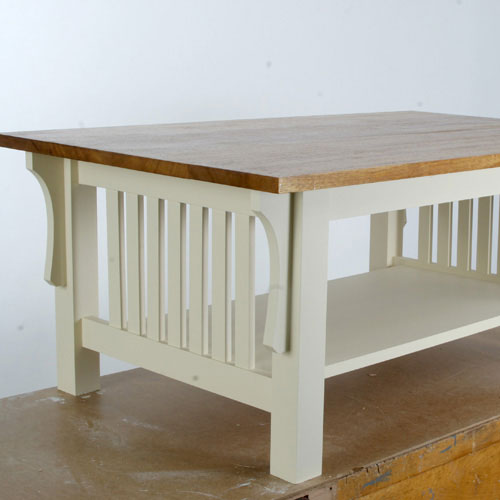
So that's all there is to the budget table. A good result from what was going to be useless firewood certainly increases the satisfaction level in the job, and the potential profit margin looks very healthy as well!
This is the completed Coffee Table Routing Project.
Written by Alan Holtham - Established woodworking author and video producer.